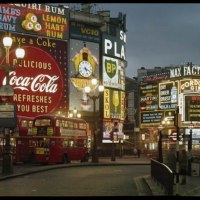
Thank you so much for this post, it is EXACTLY what I have been looking for! Idiots guide to my camera settings in plain English that even a dyslexic like me can follow! I have recently been given a ‘bridge camera’ which has lots of brilliant auto settings, but can also be set manually. So far the auto comes out with much better photos than I can manage with the manual settings and to be honest I am just getting to grips with the camera’s capabilities and idiosyncrasies however I really want to learn how to deliberately create photos like your Shibuya Street rather than accidentally manage a photo such as my Bee and Poppy photo!
I will print out your post and take it with me in my camera bag on my next outing…..
Watch this space!!
We’ve talked about the philosophy of photography and offered a two-part overview of the craft, and now we’re ready to dig deeper. As Ming Thein discussed in his posts, light is crucial to this process. No light, no photograph.
Wenjie Zhang, the photographer at A Certain Slant of Light, is passionate about architecture, landscape, still life, and travel photography. Here in part one, Wenjie introduces exposure and three elements: shutter speed, aperture, and ISO. Next week, he’ll wrap up our light lesson and discuss the quality and direction of light, and more. Much of what’s covered below applies to those of you with SLRs and dSLRs and cameras with manual modes, but we’ll sprinkle in tips for those with cameraphones and point-and-shoot cameras, too.
Introducing Light
At the heart of every photo is a story, and like ink and paper, many elements come together to tell that story. One…
View original post 1,321 more words


A good place to begin is to Select aperture-priority mode and select highest possible aperture number (smallest aperture opening) to achieve great depth of field in landscapes. Focus on closest element in foreground and keep shutter release button semi depressed while you recompose shot. You can also select lowest possible aperture number ( widest aperture opening) and zoom in close to subject to achieve sharp portraits against the desirable out of focus background
LikeLike
Thank you 🙂 those are the two types of shot I would really like to get to grips with. Now… How to generate some spare time?
LikeLike